
The theme configuration of ThemeWare® can be achieved in two possible ways:
- Via the corresponding Sales channel (recommended)
- Via the Theme configuration
In the following we show you both ways in detail.
Note: A "storefront" sales channel is always required for the delivery of a theme. How to create an another sales channel, you will learn here: Sales channel
1. Sales channel
- Open the administration of your shop
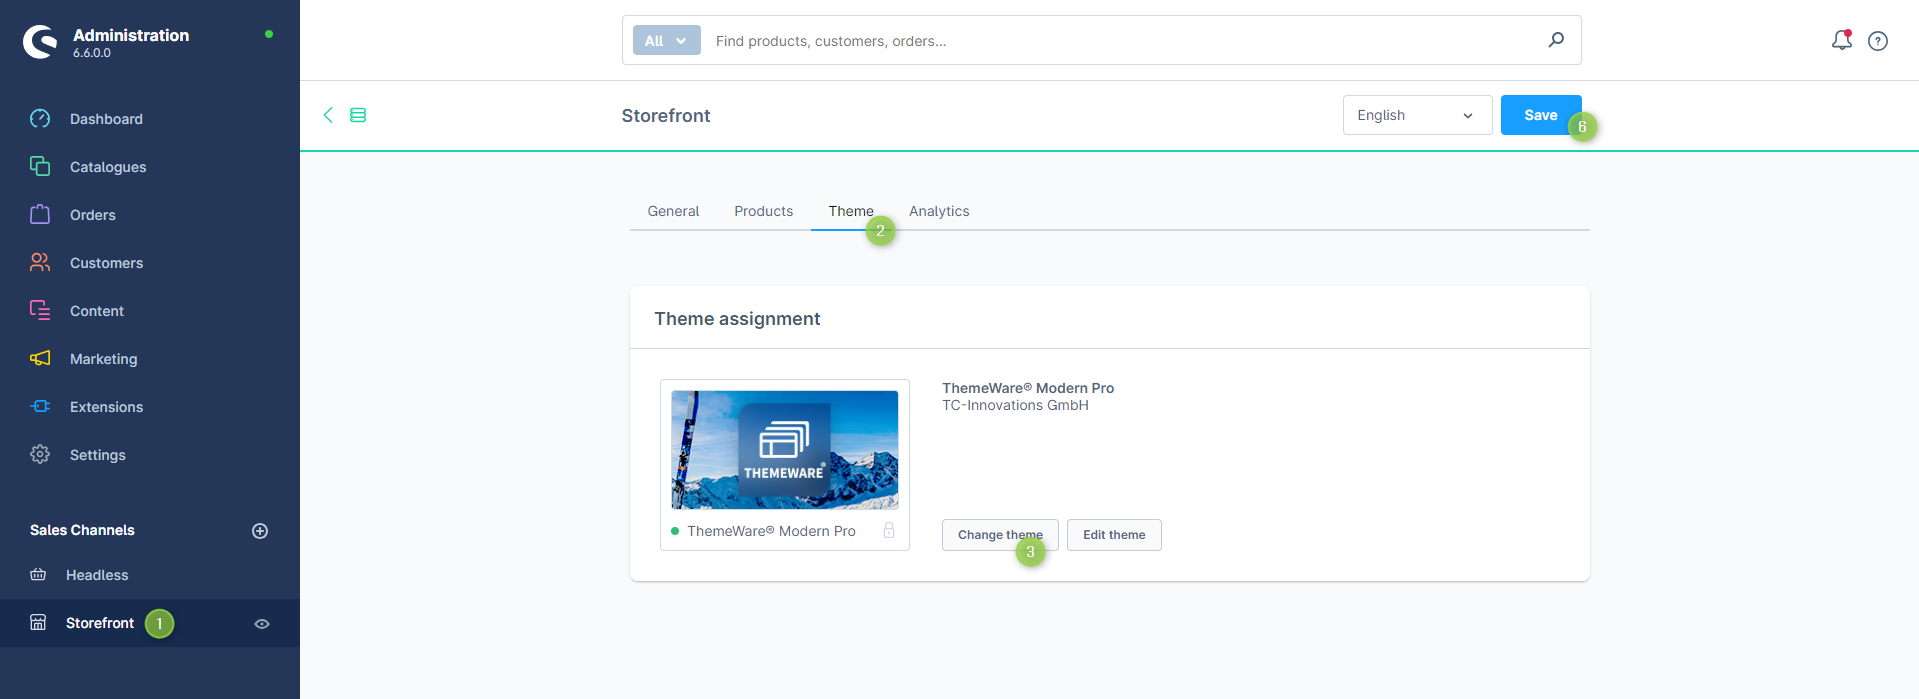
- Switch via the main navigation to the sales channel of your storefront in the section "Sales Channels" (1)
- Switch to tab "Theme" (2)
- Now click on the "Change theme" button in the "Theme assignment" section (3)
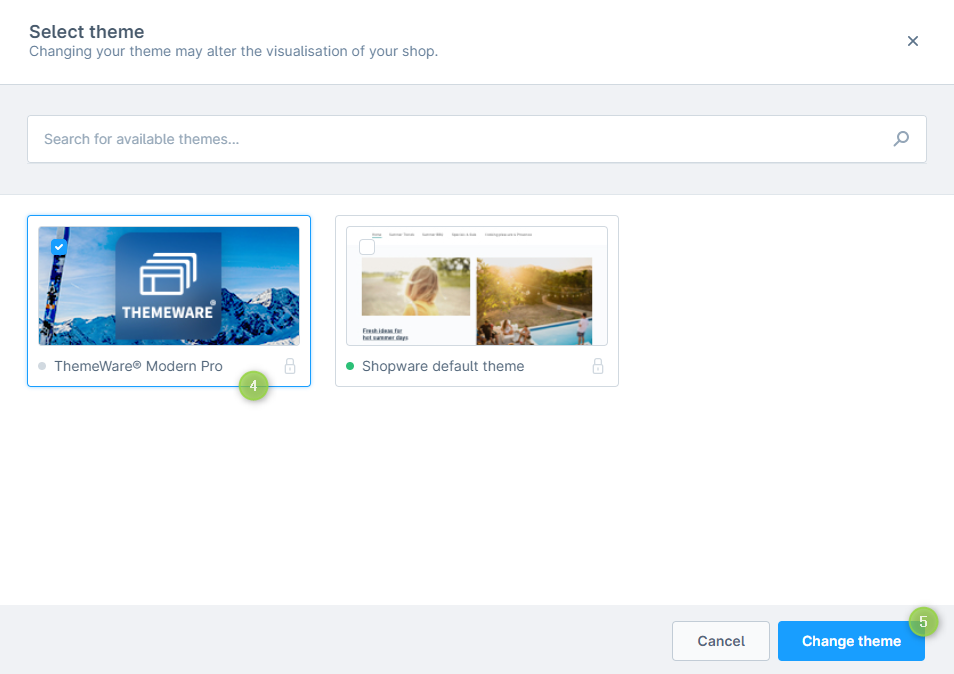
- Select your ThemeWare® theme in the "Select theme" pop-up (4) and click on the "Change theme" button (5)
- Click on "Save" at the top so that the theme will be assigned and compiled (6)
ThemeWare® has now been assigned to your storefront.
Screenshots
Tip: Now start editing ThemeWare®: Editing ThemeWare®
2. Theme configuration
- Open the administration of your shop
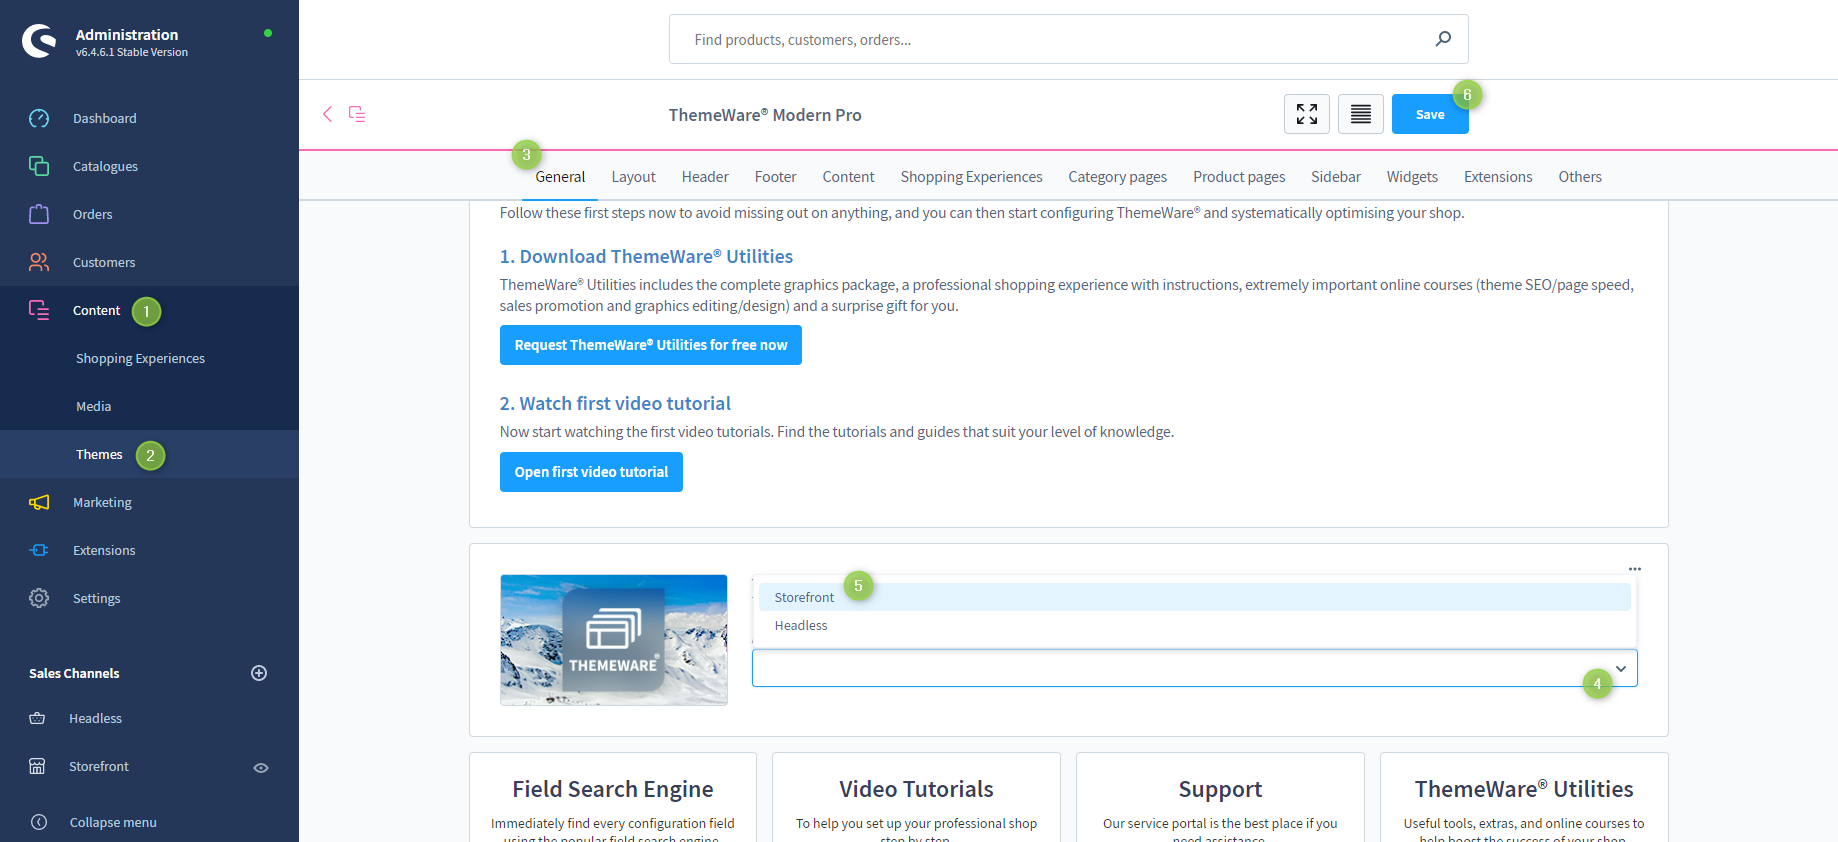
- Switch via the main navigation to the "**Theme Management **" (1) (2) ("Content" => "Themes")
- Note: In the Shopware Cloud, you will find the section "Themes" right in the main navigation.
- Now click onto your ThemeWare® theme in order to start editing
- You will automatically be in the tab "General" (3)
- Now select in the dropdown "Assigned to the following Sales Channels" (4) next to the theme preview image your sales channel of type "Storefront" (5)
- Click on the button "Save" at the top (6)
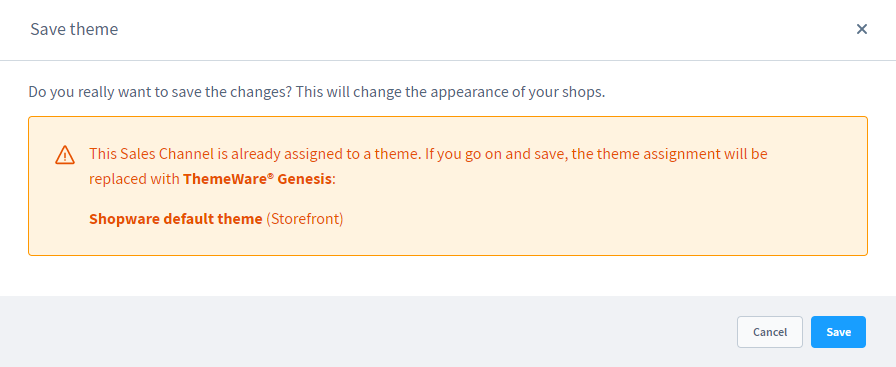
- A pop-up will appear asking once again if you really want to make the change respectively change the current assignment. Just click on "Save" here
ThemeWare® has now been assigned to your storefront.
Screenshots
Tip: Now start editing ThemeWare®: Editing ThemeWare®