
In this article you will learn how to assign ThemeWare®. This means how you make sure that ThemeWare® is represented in your storefront.
First of all, it is important to understand that the basis for delivering a theme is always a Sales Channel. This Sales Channel must be of the type "Storefront"  .
.
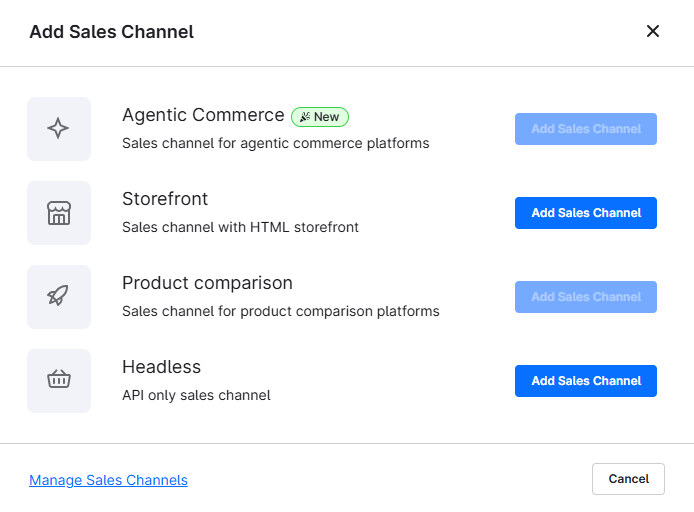
If you create a Sales Channel, you can select different types. And "Storefront" would then be the type that is necessary for the theme to be "delivered".
Tip: You do not need to create a Sales Channel of the type "Storefront" if you already have a corresponding Sales Channel.
With the default installation, Shopware usually creates a suitable Sales Channel that is titled with the shop name selected during the installation.
Assigning ThemeWare®
- Open the administration of your shop
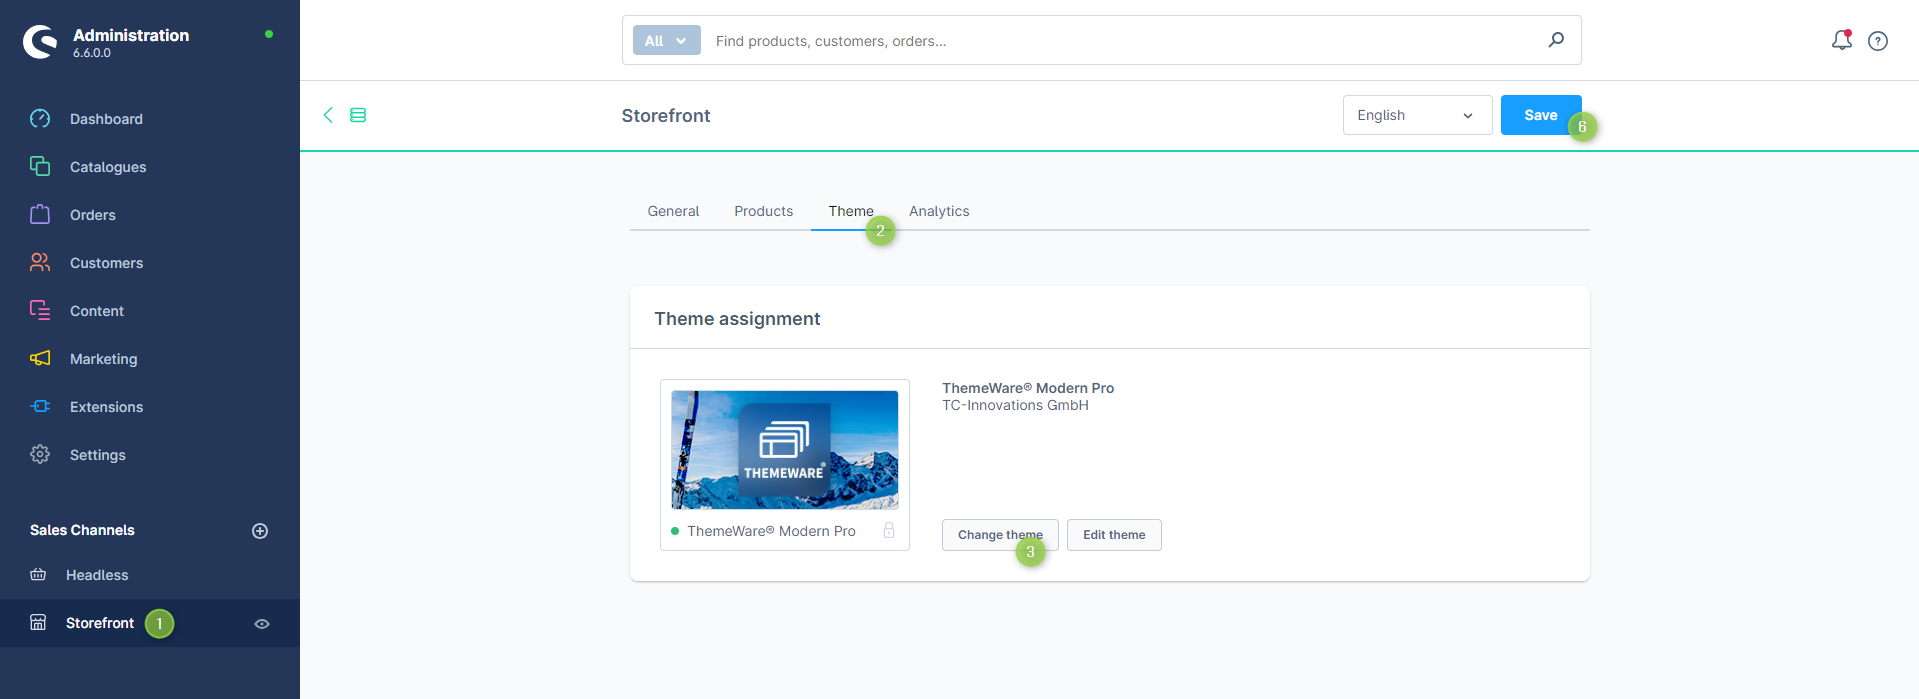
- Switch via the main navigation to the sales channel of your storefront in the section "Sales Channels" (1)
- Switch to tab "Theme" (2)
- Now click on the "Change theme" button in the "Theme assignment" section (3)
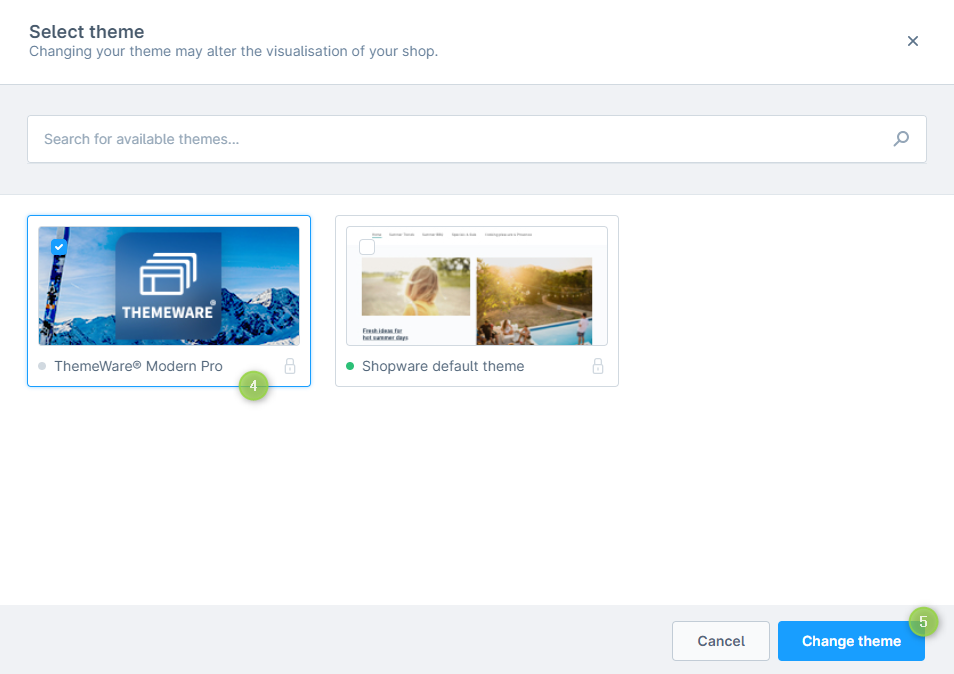
- Select your ThemeWare® theme in the "Select theme" pop-up (4) and click on the "Change theme" button (5)
- Click on "Save" at the top so that the theme will be assigned and compiled (6)
ThemeWare® has now been assigned to your storefront.
Screenshots
Further information
If you have further questions or any problems, you can find more information in our detailed tutorial: Activating ThemeWare®