
Note: This article is work in progress.
In this article we show you how to configure your shop logo.
Example
You configure the shop logo through the ThemeWare® configuration in the Shopware 6 theme manager of your administration.
Example: In our example we want to enlarge the logo a little.
- Open the administration of your shop
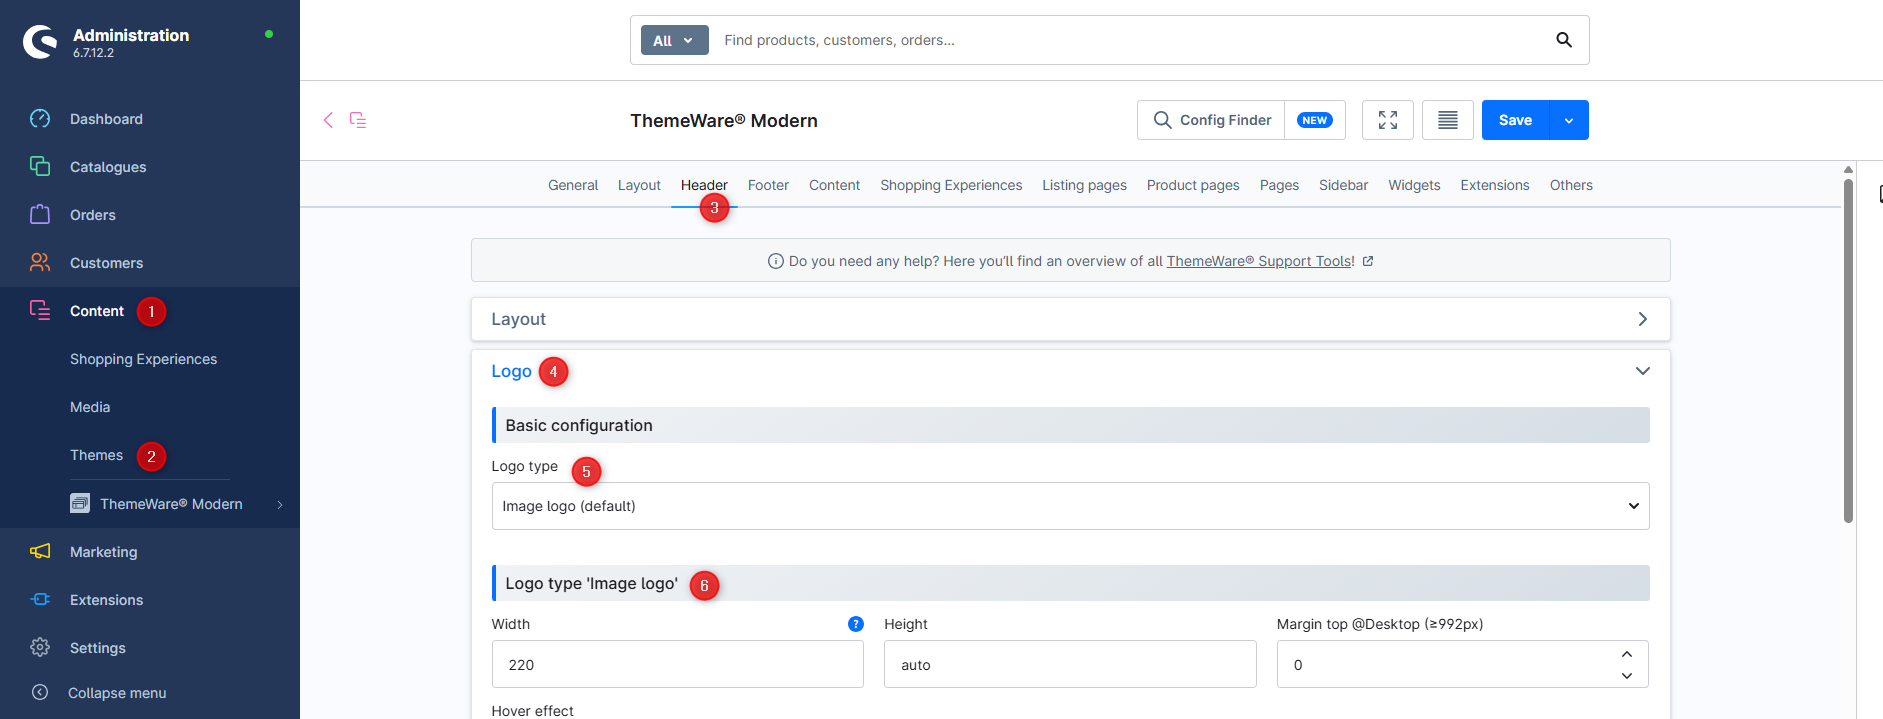
- Switch via the main navigation to the "theme administration" (1) (2) ("Content" => "Themes")
- Note: In the Shopware Cloud you will find the "Themes" area directly in the main navigation.
- Now click on your ThemeWare® theme to start editing
- Switch to the tab "Header" (3)
- Open the block "Logo" (4)
- In the section "Basic configuration" select the option "Image logo" in the configuration field "Logo type" (5)
- In the section "Logo type 'Image logo'" (6) you can configure, for example, the "Width", the "Height", the "Margin top @Desktop (≥992px)" or the "Hover effect" of the shop logo
- We change the "Width" to
240 - Save the theme configuration
- Switch to the storefront and reload the page
You have now configured your shop logo.
Screenshots

Sticky top navigation
In the block "Sticky top navigation (Basic headers: 'Header 1' and 'Header 2')" you will find the configuration for the logo of the sticky top navigation in the section "Logo".
TODO: Custom-Header

Shopping Experience header
The logo for the "Shopping Experience header" has no separate configuration. It merely replaces the actual logo on pages which use the Shopping Experience header.
TODO: ...